

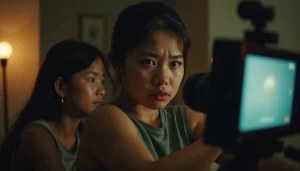
Last month I came home from a shoot at a mall in Semarang with greenish footage. Our team was making exploration content for Paragon, and I was on camera myself: a Lumix S5IIX with a Lumix S 50mm f/1.8 lens.
As soon as we walked into the supermarket area, the problem was obvious. The lights there threw off a strong green tint. Brightly colored fruit and food packaging looked unnatural, and people’s skin looked pale and greenish.
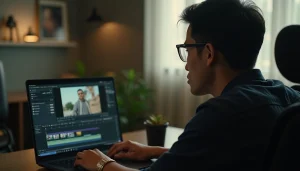
We couldn’t replace the lights across the whole mall, so the fix had to happen in post-production. In this article I combine the story of that day with the technical steps we now always use in DaVinci Resolve.
Why Does Video Turn Green Under Mall Lights?
A green color cast appears because the light source has an unbalanced spectrum that doesn’t match the camera’s white balance. Fluorescent lights and cheap LEDs often put out a dominant green or magenta.
Malls, supermarkets, food courts, hospitals, and even ruko (shophouses) with their built-in LEDs all share the same problem. In the studio we can set lights like the Aputure Amaran 200x precisely, for example 5600K for daylight. In a mall, we depend on whatever lights are already installed.
We’ve had the opposite too: a shoot at a café in Kota Lama where the lights were so orange the coffee products looked burnt. With green as strong as it was at Paragon that day, strawberries can end up looking like cucumbers.
If you record in a LOG or flat profile (low contrast and saturation to leave plenty of room for grading), the green cast can sometimes look even more obvious on the camera screen. That’s actually good news, because there’s still enough data to correct it.
How to Fix Greenish Video in DaVinci Resolve
This is the order I used for that mall footage, and also for footage a client sent us from a ruko in the Banyumanik area, where the talent’s skin had turned green from the shophouse’s built-in LEDs.
- Basic white balance correction (Temperature & Tint). Shift Temperature toward blue if the image is too orange, or toward orange if it’s too blue. Then shift Tint toward magenta, the opposite of green, until white objects look white and skin looks natural again.
- Primary Color Wheels: Gamma and Gain toward magenta. The Color page has three wheels: Lift (shadows), Gamma (midtones), and Gain (highlights). Nudge the center point of the Gamma and Gain wheels toward magenta, little by little. Don’t go too far: watch the talent’s skin and keep the detail in the shadows.
- Curves: Hue vs Sat and Hue vs Hue. If some green still lingers in certain areas, lower the saturation of the green point on the Hue vs Sat curve. In Hue vs Hue, shift the green point slightly toward yellow or cyan, whichever looks more natural. This step often fixes side effects from step 2, such as skin turning too magenta or blues turning purplish.
- Qualifier: isolate only the problem green. Pick the green with the eyedropper, refine the Hue, Saturation, and Luminance ranges, then correct only that area. In the mall footage, this let me reduce the green from the light reflections without changing the green of decorative leaves or vegetables that are supposed to be green.
For one short clip with a severe color problem, this process takes 15–30 minutes. For a whole project, it can take hours. The result is worth it: product colors are bright again and skin looks healthy.
When Do You Need In-Depth Color Grading, Not Just a LUT?
Color grading isn’t just for making a video look “cinematic”. There are four situations where in-depth color correction is a must:
- Locations with problematic lighting — malls, supermarkets, hospitals, offices with old fluorescent tubes.
- Footage shot without a LOG profile — cameras like the Lumix S5IIX can record V-Log, which leaves plenty of room for correction. With a standard color profile, there’s much less room to fix things.
- A specific mood — for example cool, dark colors for a tense story, or warm, bright ones for light content.
- Footage from different light sources — some daylight, some indoor lights. We once made a company profile video for a factory around Banyumanik where the lighting was a mix of modern LEDs and old fluorescent tubes. Without grading, the transitions between scenes were jarring.
Color Grading vs. Fixing the Lighting on Location
| Aspect | Color grading (post-production) | Fixing the lighting on location |
|---|---|---|
| Cost | Relatively cheap if you already have the software and skills; the main cost is the editor’s time. | Can be expensive if you need a generator, extra big lights, or permits to use the area. |
| Flexibility | Can fix almost any color problem and unify the look. | Limited to the gear you bring; hard if the main lights can’t be changed. |
| Time | After the shoot; can take hours per video. | Before or during the shoot; takes setup time on location. |
| Risk | Looks unnatural if overdone; requires skill. | Technical risks (generator, cables) and limited room to move. |
For fast-paced event coverage, relying on the existing lights and then doing a little grading is usually the most efficient. For product or company profile videos, investing in lighting on location is almost always cheaper than fixing it later.
How to Prevent Greenish Video During the Shoot
Color detail that’s already damaged in the recording can’t be fully recovered, so preparing before the shoot is still the cheapest option:
- Bring your own lights with adjustable color temperature and a high CRI (Color Rendering Index, how accurately a light renders color), for example 5600K for daylight or 3200K for tungsten.
- Custom white balance in camera. Point the camera at a sheet of white or gray paper under the location’s lights, then set the white balance from that.
- Record in LOG or flat so you keep plenty of room for correction in DaVinci. For locations that are both dark and badly lit, also check out camera settings for low-light video.
The most honest lesson from that day at Paragon: color grading works best as a safety net, not as the main plan.
Need a visual production team for a project in Semarang? Labstory is a production house based in Semarang. See Labstory’s portfolio for examples of our work, or get to know our team and approach.
FAQ
Why does video turn green when shooting in a mall or shophouse?
Fluorescent lights and cheap LEDs in malls, supermarkets, or shophouses have an unbalanced spectrum dominated by green. If the camera’s white balance isn’t adjusted, product colors and skin get recorded with a green tint.
Which DaVinci Resolve tools fix greenish video?
In order: Temperature and Tint (Tint toward magenta), Primary Color Wheels (Gamma and Gain toward magenta), Curves Hue vs Sat and Hue vs Hue, then the Qualifier to isolate only the problem green.
How long does it take to fix greenish video colors?
For one short clip with a severe problem, about 15–30 minutes. For a whole project it can take hours, depending on the number of clips and how mixed the lighting is.
How do you prevent greenish video from the start of the shoot?
Bring your own lights with adjustable color temperature and a high CRI, do a custom white balance under the location’s lights, and record in LOG or flat so you keep plenty of room for correction.
Can color grading fix every lighting problem?
No. Color grading is effective for color problems caused by a poor light spectrum, but it can’t bring back detail lost to severe overexposure or underexposure. You still need to get the exposure right during the shoot.

Leave a Reply